

Got an old computer collecting dust in the closet? The one you swore you’d find a use for someday? Today’s the day. Instead of dropping hundreds (or thousands) on shiny new hardware, you can turn that machine into a working media server. It’s a cheap way to learn the ropes of home media servers before you commit real money.
And the best part? You don’t need much to get going. A little time and some free software, and you’ll be streaming your movies, shows, and music from that old box. Here’s what you need and how to wire it up.
Why Start With an Old Computer?
There’s one rule when you’re new to home media servers: start small, upgrade later. The common mistake is jumping straight into an expensive custom build, then realizing the hobby isn’t what you thought it would be. An old computer is a low-risk way to learn the basics and find out if this is your thing.
Think of it as training wheels. You learn how to install software, organize your media, and troubleshoot the inevitable weirdness, all without burning cash on high-end hardware. And it’s eco-friendly. That old PC gets a second life instead of a trip to the e-waste pile.
Minimum Specifications: What Does Your Old Computer Need?
You don’t need a gaming rig to run a basic Ubuntu-based Jellyfin server. Ubuntu Server and Jellyfin are both lightweight, so your old machine can probably handle it. Here’s the bare minimum to get started.
Bare Minimum Hardware Requirements
- Processor (CPU): Intel Core i3 2nd Gen or AMD equivalent
- RAM: 4 GB
- Storage: At least 100 GB of free space (more if you plan to store lots of media locally).
- Operating System: Ubuntu Server 24.04 LTS
- USB Stick: 32 GB for the OS installation
- Network: An Ethernet connection (wired or Wi-Fi)
That’s enough to get a Jellyfin server on its feet. As your library grows or you want extra features, you can upgrade later.
Best Experience Recommended Hardware
Processor: No change
RAM: 8 GB
OS Storage: 200 GB of SSD storage
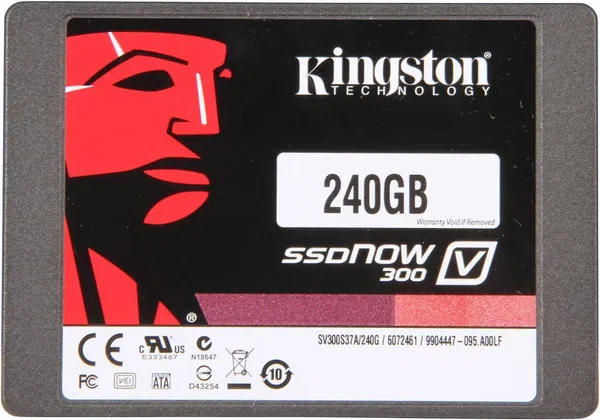
Kingston 240GB SSD
A cheap, dependable SATA SSD for a boot drive. 240GB is plenty for a Linux install plus Docker images and leaves the spinning disks free to do nothing but hold media. Not fast by NVMe standards and not what you want for a cache tier, but it is the standard answer for getting an old desktop booting off flash instead of a tired hard drive.
Contains affiliate links. I may earn a commission at no cost to you.Media Storage: 8 TB or more depending on the size of your media collection
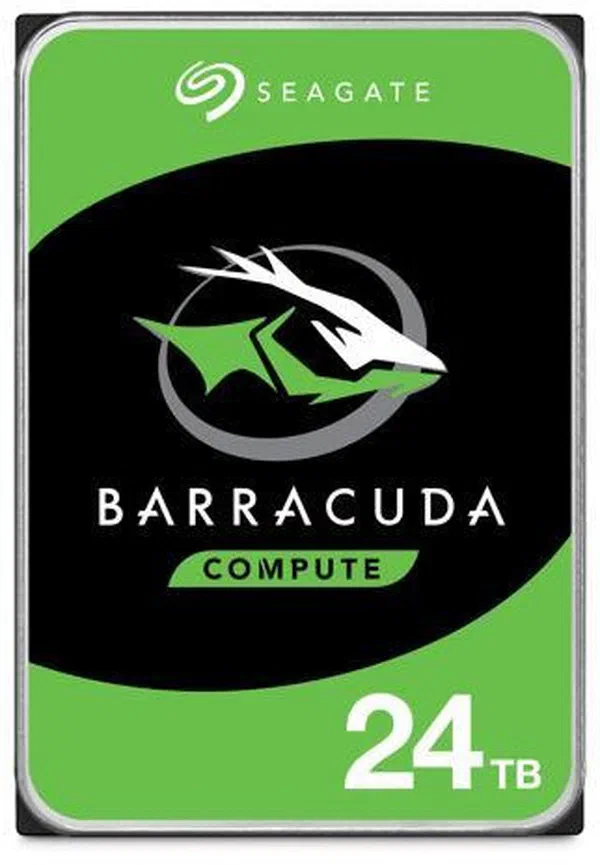
Seagate Barracuda 24TB Internal Hard Drive
A 3.5-inch SATA desktop-class drive that delivers huge capacity for bulk storage. Perfect for media libraries, game installs, and cold backups without paying NAS/enterprise premiums. Best for single-drive or light-duty DAS use
Contains affiliate links. I may earn a commission at no cost to you.Network: A wired ethernet connection is best


If your computer meets these specs, you’re ready. If not, you can probably still make it work with a few tweaks, especially if you’re not asking it to transcode video on the fly. Transcoding gets its own post later in the series.
Proof Old Computers Will Work
To show you this works on real, old hardware, I’m building a media server with these parts:
- Processor: i5-2500k. This CPU shipped in 2011.
- RAM: 16 GB
- OS Storage: 500 GB SSD
- Media Storage: Two 2 TB Hard Drives
- Video Card: NVIDIA 750ti (only needed for the install)
So you’ve found a candidate machine. Now it’s time to turn it into a media server by installing Ubuntu Server 24.04 LTS. This release is built for secure, efficient server work, and it runs fine on older hardware. Here’s how to get it installed and out of your way.
And yes, Debian or any other mainstream Linux distro will work. I picked Ubuntu because it’s popular, well-documented, and you’ll find an answer to almost any question with one search.
Installing Ubuntu Server 24.04 LTS
Time for the fun part. Follow these steps to get Ubuntu 24.04 installed and running.
1. Prepare Your Old Computer and Thumb Drive
- Hook up a monitor, keyboard, and mouse for setup.
- Download the Ubuntu Server 24.04 LTS ISO from Ubuntu.com.
- Use Rufus (on Windows) or Etcher (on macOS/Linux) to write a bootable USB drive with the ISO.
2. Use Rufus to Create a Bootable Thumb Drive
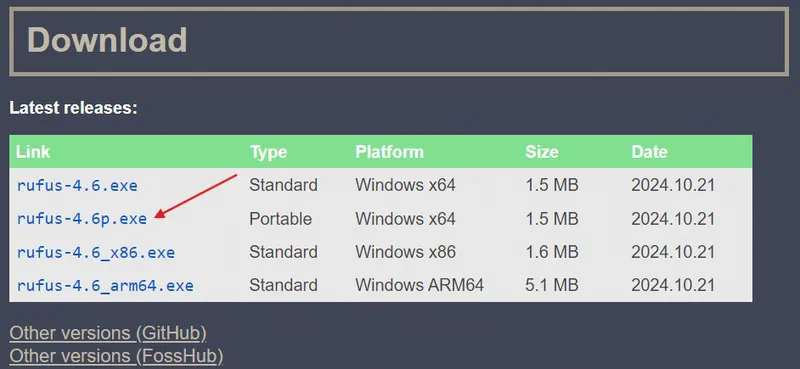
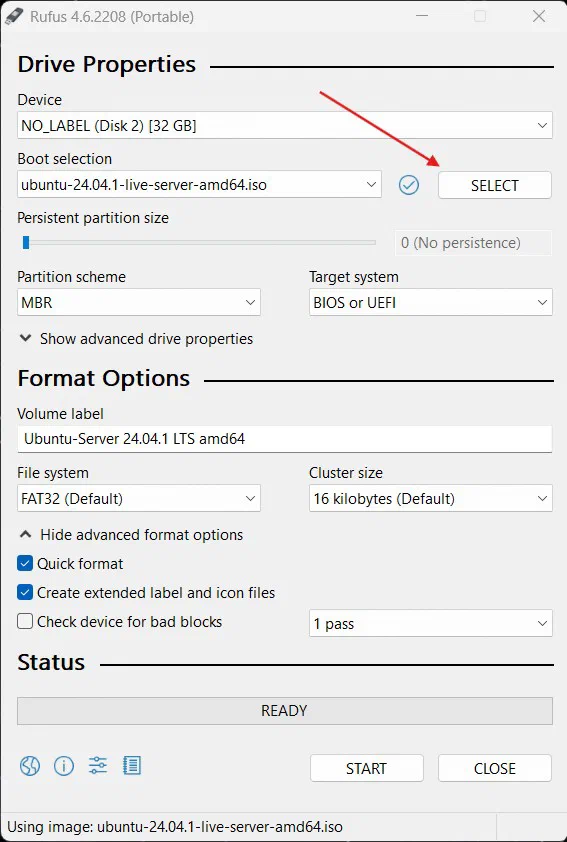
Download the portable version of Rufus
Open Rufus
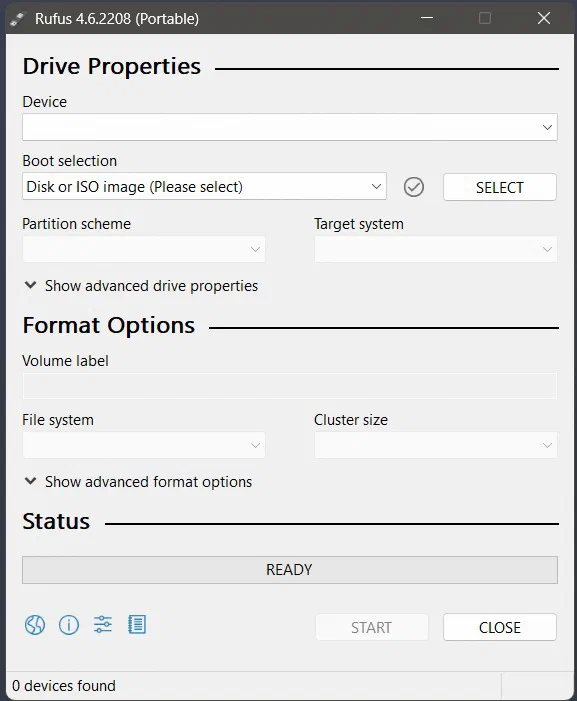
Press SELECT to pick the Ubuntu Server ISO you downloaded, then press START
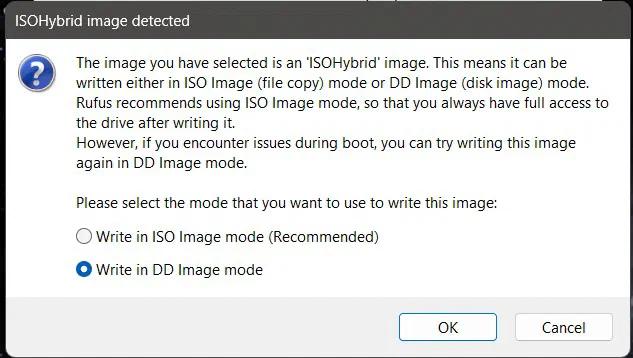
When prompted, write in DD Image mode
Press OK to format the USB stick
- This wipes everything on the drive.
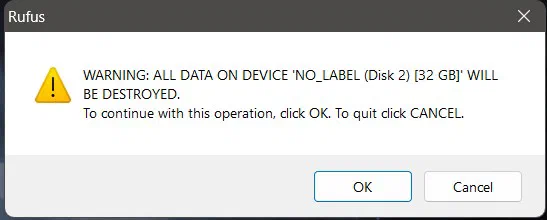
- This wipes everything on the drive.


You now have a bootable USB stick with Ubuntu Server on it.
3. Boot from USB
Insert the bootable USB into the computer you’re installing Ubuntu on.
Power on and enter the BIOS/UEFI settings. The hotkey is usually F2, F12, Del, or Esc during the splash screen.
Set the boot order so USB comes before the hard drive. That way, if a USB is present, the system boots from it first.
Save and exit. The system reboots into the Ubuntu Server installer.
4. Begin the Installation
GNU Grub Menu. When prompted, press enter.
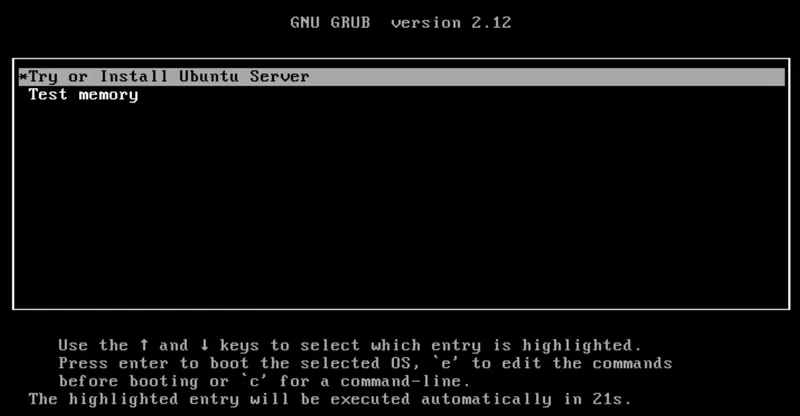
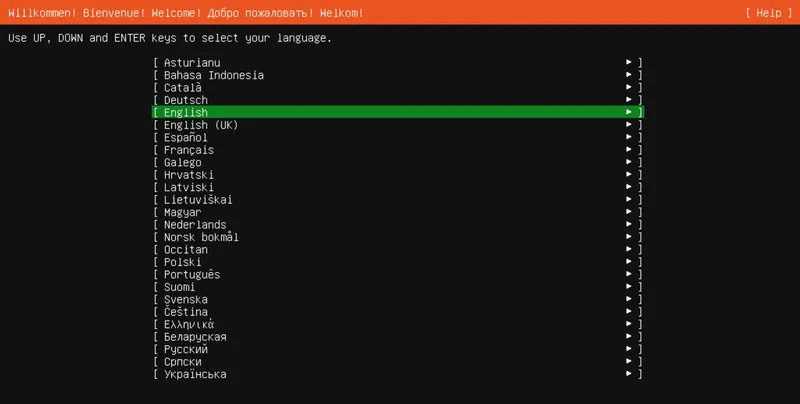
Select your default language
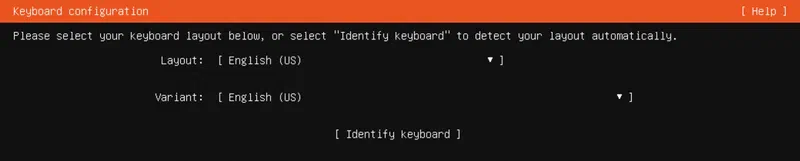
Select your keyboard layout
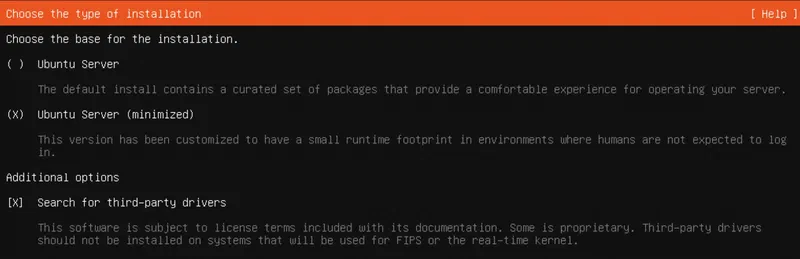
Pick the install type. Select Ubuntu Server (minimized) and “Search for third-party drivers”.
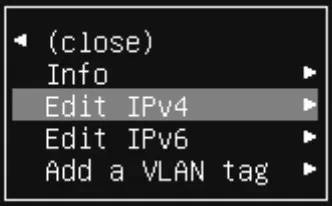
Network Config. This is a server, so it needs a static IP (one that doesn’t change). Tab up to the network device name (yours will be different) and press enter.

You’ll see this menu. Select Edit IPv4 and press enter.
Select Manual from the menu and press enter
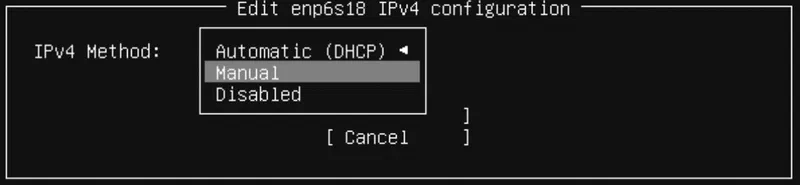
My network config will be different from yours. Chances are your network is on the 192.168.0.0/24 or 192.168.1.0/24 subnet. If you don’t know what your network is, open PowerShell on Windows and run:


ipconfig -all
The
ipconfigoutput gives you everything you need for the IPv4 config page.One thing changes between Windows and Linux: the subnet format. Windows shows 255.255.255.0. Linux wants CIDR. Take your IP, change the last octet to 0, and tack on /24, like this:
192.168.0.0/24
or
192.168.1.0/24

Proxy Config. Leave this blank unless you know you’re behind a proxy.

Guided Storage Configuration. For this first setup, leave everything default. I’ll cover a more advanced storage layout in another post.
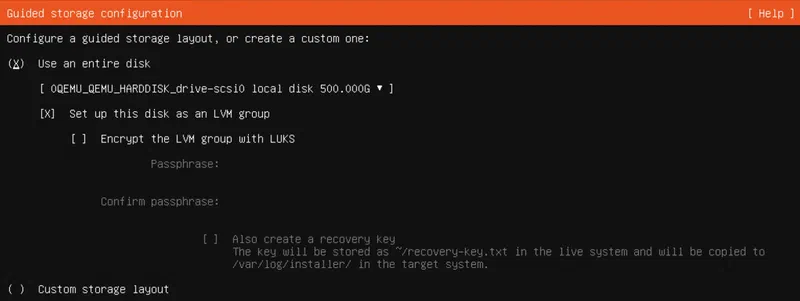
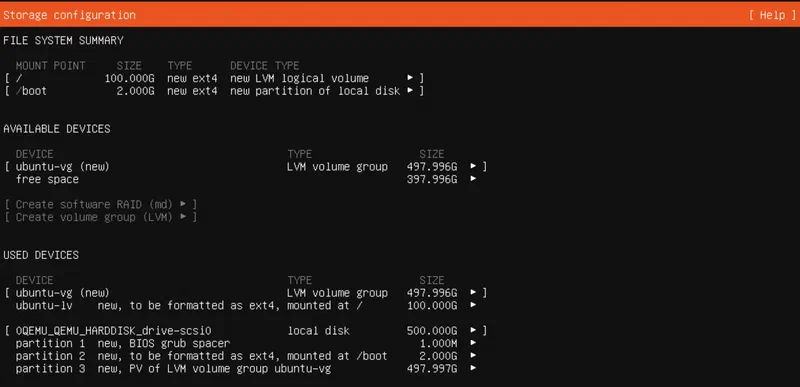
Storage Config Summary
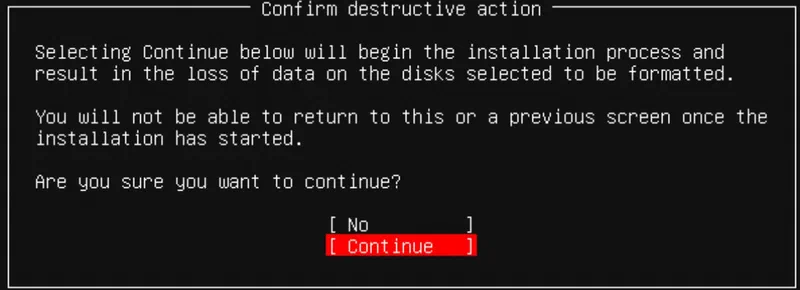
Confirm Destructive Action. This wipes everything from the selected drive.
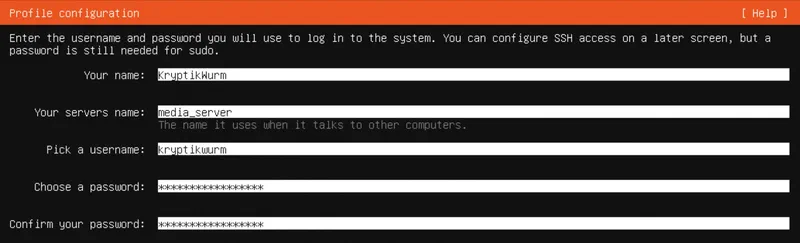
Profile Configuration
Your name. Not the username. I make my username and name match.
Your server name. What do you want to call your server?
Pick a username. I use what I put in the Your name block.
Password. Make this a strong one.
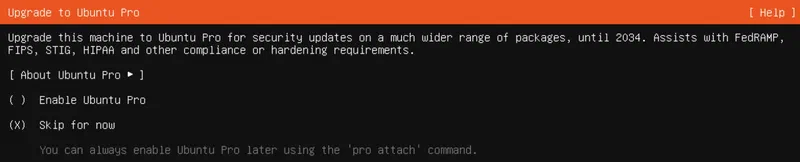
Upgrade to Ubuntu Pro. Skip for now.
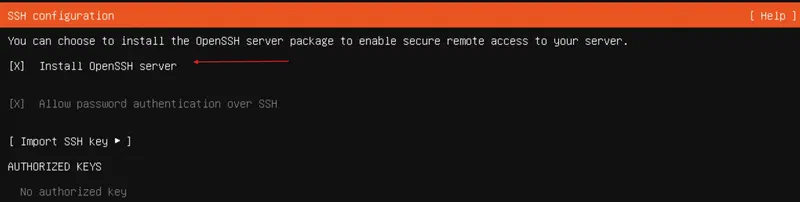
SSH Config. Select Install OpenSSH server.
Third-party drivers. If you have any, install them here.

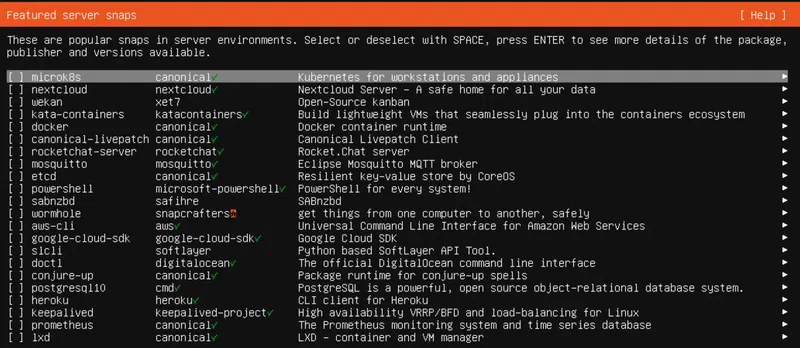
Featured Server Snaps. Leave all of these blank.
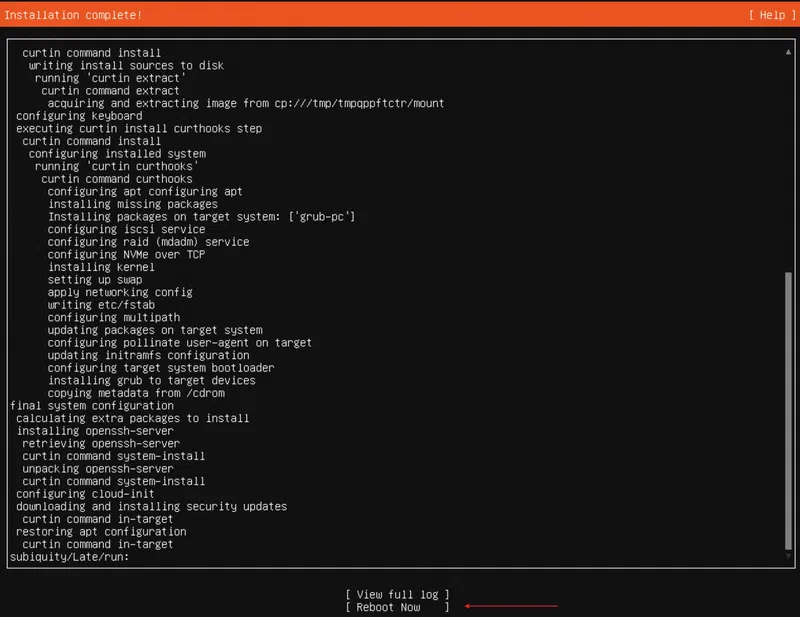
The install takes a few minutes. When it’s done, remove the USB stick and reboot.
Login. Confirm you can log in with the username and password you set during the install.
Update the server. Run this to pull any updates. I run it about once a week so the box stays current on security patches.


sudo apt update && sudo apt upgrade -y
- Reboot from the command line.
sudo reboot
Sharp-eyed readers will notice I’m installing this on a VM, not the i5-2500k. That’s how I captured the screenshots. I’ll install Ubuntu on the physical box and use it going forward.
Congratulations. You’ve set up an Ubuntu server.
Ready to bring your media server to life? Head to Part 2 to install Jellyfin and get one step closer to streaming your library.